I adore the summer! In fact, it might just be my favorite of the four seasons. And there are so many reasons why this is the case.
Just the thought of spending long sunny days at the beach is enough to put a smile on my face – but that’s not the only wonderful thing that makes this time of year so special.
Thanks to blue skies and golden sunshine – summer is the perfect season to enjoy a delicious homemade treat in the back garden. And lord knows I have plenty of recipes that will perfectly complement a hot summer’s day.
But what is the quintessential dish of the summer season? Well, ice cream of course! And I have an amazing ice cream recipe that is simply begging to be made.
Blueberries are a versatile fruit that can be used for all kinds of cooking. But they can taste particularly delicious when added to refreshing and smooth ice cream. Down below I have outlined the process of creating your own homemade blueberry ice cream.
This recipe guide covers everything you need to know and promises to deliver an ice cream bursting with berry goodness. And it doesn’t need eggs!
So check it out and make this summer the best one yet!
Step One: Blueberry Sauce
With many blueberry ice cream recipes, you are expected to make a blueberry sauce that mixes into the main ice cream base. This is a slow process and requires you to strain away any excess skin or seeds.
However, for my ice cream recipe, I prefer to use the entire blueberry – yes, skin and seeds as well!
Blueberry skins are packed with natural flavor and they are also full of tasty nutrients that are good for our bodies. Not only are they incredibly delicious, but they also help to give the finished ice cream a unique and chunky texture.
It’s also just easier using the whole blueberry when you’re trying to make something simple.
You should place your blueberries in a wide and shallow pot, along with some sugar, water and cardamom. Place the pot over medium heat and let the blueberries cook until the skin begins to burst open from the heat.
Then take a potato masher and crush the berries, before allowing them to cook longer until they have thickened into a dark sauce. You should let this cool for 15-20 minutes, before adding it to your ice cream base.
Step Two: Ice Cream Base
When it comes to making homemade ice cream, most recipes will ask you to make a custard base from eggs and cream, which can be a stressful and complicated process.
One of my favorite things about this recipe is that it doesn’t use eggs to make the ice cream base. Instead, the creaminess of the finished product comes from the addition of heavy cream and whole milk to the recipe.
For this part of the recipe, you do not need to do anything difficult or complex. Simply take the cream and milk from the fridge and combine them in a large bowl.
If you want to ensure that your ice cream has a smooth texture, then you must only use heavy cream and whole milk when making the recipe. The fat in these dairy products is what gives the ice cream its consistency, so using reduced fats could ruin the final result.
Once you have stirred the milk and cream together, then you can combine your blueberry sauce with your ice cream base. Before adding the combined mixture to your ice cream maker, I would recommend letting it chill in the fridge overnight.
Sometimes the mixture can separate in the fridge, but this can be easily fixed by giving it a good stir to mix the ingredients back together.
Step Three: Churning Time
When your ice cream mixture has fully chilled, then you can bring out your ice cream maker. Of course, all ice cream makers have different settings and times, so I would recommend reading your maker’s instructions to ensure it is being used correctly.
Always remember that when your ice cream maker is churning your mixture, the volume of the ice cream will begin to increase by 50 %. To avoid any complications or mess, I would suggest only filling your ice cream maker 2/3 of the way.
If this leaves you with any leftover mixture, then you can store it in the fridge until you are ready to churn it.
Some ice cream makers can be used to give your ice cream a fluffy consistency – similar to soft-serve. If this is the case, then you will need to transfer your ice cream into a container and then put it in the freezer until it is solid.
If you want to speed up this process, then I would recommend storing the ice cream in a metal tin.
Once your blueberry ice cream is ready, then you can serve it in a variety of different ways! I personally enjoy serving it in a waffle cone, which helps to give the ice cream an authentic summer vibe.
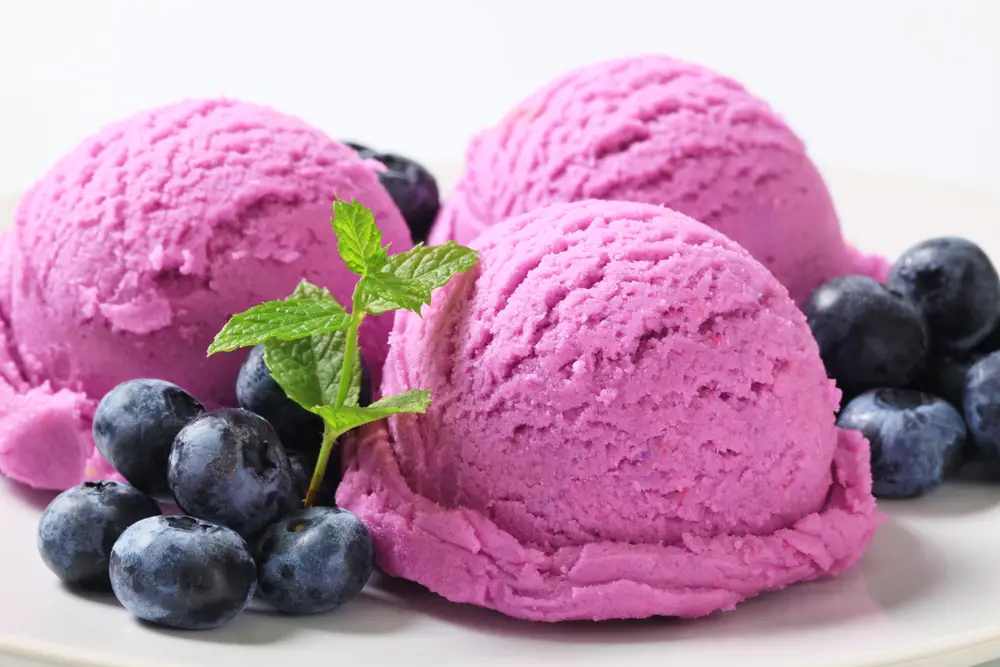
However, if you prefer a more traditional serving, then you can place a few scoops into a bowl with some loose blueberries for decoration. I also would recommend garnishing your ice cream with a sprig of fresh mint, which can add a refreshing zest.
Homemade Blueberry Ice Cream Recipe
Ingredients
- Blueberries (4 cups)
- White Sugar (1 ½ cups)
- Whole Milk (3 cups)
- Heavy Cream (1 cup)
- Water (2 tbsp)
- Cardamom (1 tbsp)
Method
- Combine blueberries, sugar, cardamom and water in a low, shallow pot.
- Place the pot over medium heat and let simmer until the blueberries begin to burst. (5 minutes)
- Crush the blueberries with a potato masher and then let cook until the sauce has thickened. (5-10 minutes)
- Allow the finished sauce to cool for 15 minutes.
- In a large bowl, stir together the heavy cream and whole milk until fully combined.
- Pour the blueberry sauce into the ice cream base and combine.
- Place ice cream mixture into the fridge and allow to chill overnight (or for one hour).
- Read instructions and add the mixture to your ice cream maker.
- When fully churned, take the ice cream and allow it to freeze in your freezer. (8 hours)
- Serve in a bowl with fresh mint and blueberries and enjoy!


